Team: Huntress SAT
Product: Phishing scenario "Create something new"
Summary: How to Create a Customized Scenario Using Phishing Creator
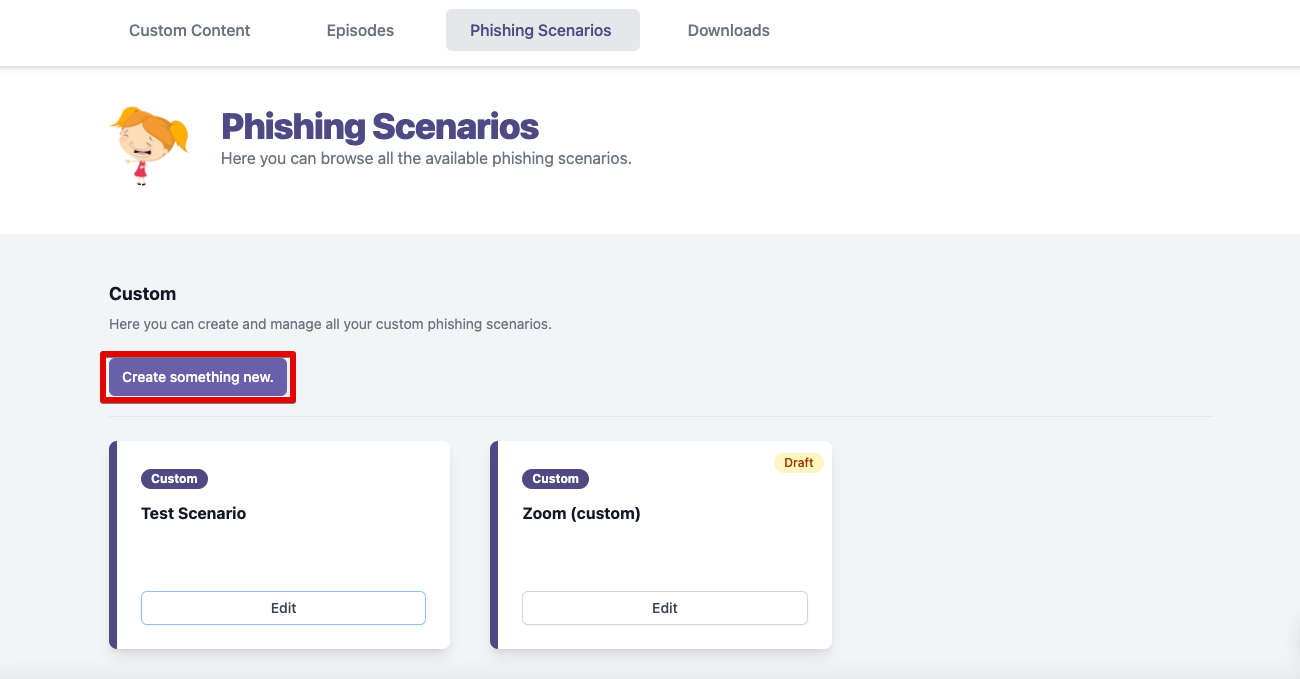
To create your own custom phishing scenario, select the ‘Library’ tab of the SAT admin platform and navigate to the ‘Phishing Scenarios’ section. (PRO TIP: click ‘Phishing Scenarios’ from the top of the screen to save from scrolling.)
1. Begin by clicking the purple ‘Create something new’ button.
2. Give your new scenario a title (don’t worry, you can always change the title later).
3. Click the Plus Button to begin adding content blocks to your new scenario.
4. The content options will expand allowing you to choose from:
-
Text: Every scenario should say something, and this is where the Text blocks come in. With text blocks you can add the written content that will appear in the scenario email. You will also be able to adjust the size (title, subtitle, paragraph) and color of the text, the background color of the block, and the alignment of the box.
-
Button: A button is the perfect way to include a call to action in your custom phishing scenario. You will be able to add text to the button, adjust its size and appearance, and determine where its placement in the scenario email.
-
Image: Adding images will make your scenario look more believable, especially if you want to mimic a brand your learners would recognize or use on a regular basis.
You can rearrange these elements after adding them -- no need to worry about deleting something you’ve already made or starting from scratch if you forget something along the way.
Let’s start with the Text option:
1. After adding the Text block, move your cursor to the box and click on the gear icon to open the block’s settings.
2. The Content tab is where you will add the text for this block. First, decide the size of text in this block from the ‘Type’ section. Options include: title (extra large), subtitle (large), and paragraph (body).
Next, add content from the ‘Text’ box below. You can also customize the color of the text by entering a hex code or clicking on the color box and using the controls to make your choice.
PRO TIP: All text added to this block will assume the formatting selected. You will want to add a new text block to change from one text type to another in your scenario. Reducing the padding (see below) between blocks will make it look like there is a simple line break from one block of text to the other.
3. The Block tab includes options to add a background color to the Text block, adjust its alignment and padding, and choose whether or not to round its edges.
Be sure to click the purple ‘Update’ buttons along the way to lock in your content and block settings. For example, anything added to the text section will not appear in the actual Text block if you don’t click ‘Update.’
For the Button option:
1. After adding the Button block, select the gear icon to open the block’s settings.
2. The Content tab is where you may add text and customize the colors and styles of the Button block. This includes button size, color, shape, and padding.
3. The Block tab includes options to add a background color to the Button block, as well as other customizations like block alignment, padding, and corners.
Click purple ‘Update’ buttons along the way to lock in your content and block settings.
For the Image option:
- After adding the Image block, select the gear icon to open the block’s settings.
2. The Content tab is where you may add your image. You may select ‘Resize to Fit’ for a more neatly displayed image.
3. Navigate to the block tab, where you may add a background color to the Image block, customizing the color, shape, and size of the background.
Click purple ‘Update’ buttons along the way to lock in your content and block settings.
Arranging your scenario content blocks
Content blocks added to the scenario builder can be easily be rearranged at any point by hovering over a block and clicking the up/down arrows icon. You will have the choice to move a block one slot up or down in order. Repeat this step with any content block to arrange them in the perfect order for your scenario.
Previewing your custom scenario
The best way to get an accurate view of what the custom scenario will look like as an actual email is to open in in a preview window. Click the purple ‘Preview’ button at the top right-hand corner of the Content Creator.
A new window will open where you can preview the email in either desktop or mobile view and admire your work!
Custom Scenario Settings
You will also want to review and configure the custom scenario’s settings before using it in a phishing campaign. Go to the top of the screen and click the ‘Settings’ button on the right-hand corner of the screen. The scenario’s Settings page will open.
- Review and, if needed, change the title of the scenario from the ‘Title and Description’ section.
2. Use the ‘Theme’ section to create a more convincing, unified experience by adding the color of the brand you are trying to mimic.
3. Add a company logo to your scenario using the ‘Logo’ section.
4. Subject: Decide what you want the subject line of the custom scenario emails should read and enter it here.
5. Sender: The sender field displays who the email appears to be sending from. You may enter an individual’s name or a company name.
6. Bait Link: This is the link a Learner would click on in an email. Choose a URL that aligns with the phishing template content.
7. Status: Choose ‘Draft’ if you are working on the template, or ‘Published’ if you are ready to send out the phishing template as a simulation.
8. Go to the ‘
Advanced’ section of the settings page if you ever need to delete a custom phishing scenario. Please be certain before you click the red ‘
Delete this email’ button because there is no going back once you do. You will need to create it again from scratch if you delete the scenario.
Click purple ‘Update’ buttons along the way to lock in your content and block settings.
