
Team: Huntress Managed Endpoint Detection and Response (EDR)
Product: SAML SSO for Huntress.io
Environment: Google Workspace and Huntress.io portals
Summary: Setting up SAML SSO for Google Workspace
This guide is for setting up SAML SSO with Google Workspace and Huntress. For known limitations and caveats of our SAML, please see SAML SSO
Note: Users will need to be added to the Huntress Portal first before SSO will allow them to sign in.
Setting Up SAML App
- Log into your Google Workspace account as an admin.
- Navigate to Apps -> Web and mobile apps

- Then add a custom SAML app

- Then name your SAML app (e.g. Huntress SSO)

-
Next, you will be provided with the SSO details for your SAML app.
- With this information, log into the Huntress dashboard, Huntress.io.
- Once signed in navigate to the settings menu. Hamburger menu icon (upper right) -> Settings.

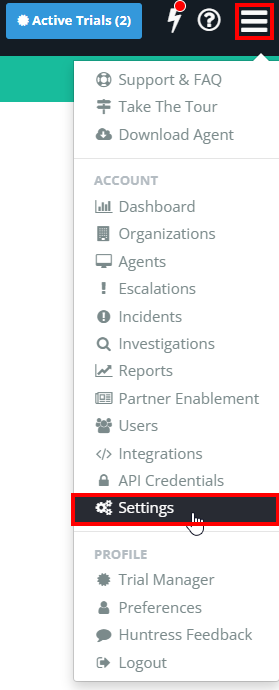
- Once in settings, select “Setup SAML SSO”

-
Enter in the information that was provided by Google Workspace and save it.
| SSO Service URL | "SSO URL" - Starts with "https://accounts.google.com/" |
| Entity ID (URL) | "Entity ID" - Starts with "https://accounts.google.com/" |
| Certificate | "Certificate (base64) - Click the "copy" button and copy & paste its contents into the Huntress dialog box. |

-
After filling that out, return to Google Workspace to finish the SAML setup. You will need to enter the following information into the SSO configuration page.
| ACS URL | https://huntress.io/sso/auth |
| Entity ID | https://huntress.io/sso/metadata |
| Start URL | https://huntress.io/sso |

-
Then, the Name ID format should be set to EMAIL and Name ID set to Basic Information > Primary email
-
No attribute mapping is required to have SSO working.
-
To make sure things are working, test the login from Huntress.io. Once a successful login has been completed, you can then enforce SSO for your account.


Note: Once finished, be sure to enable the application for your users or for a specific group within Google Workspace.